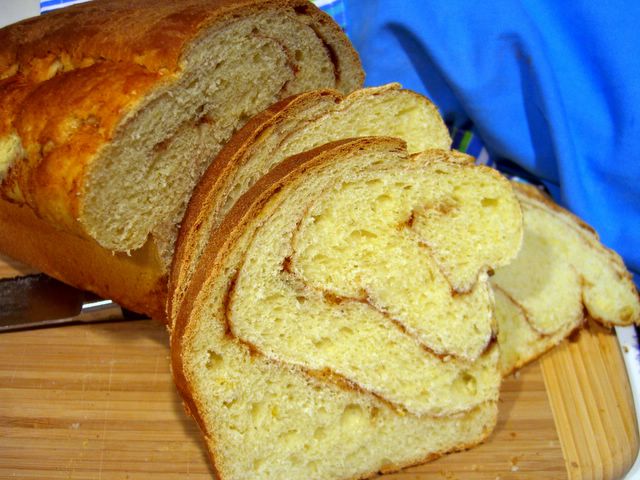
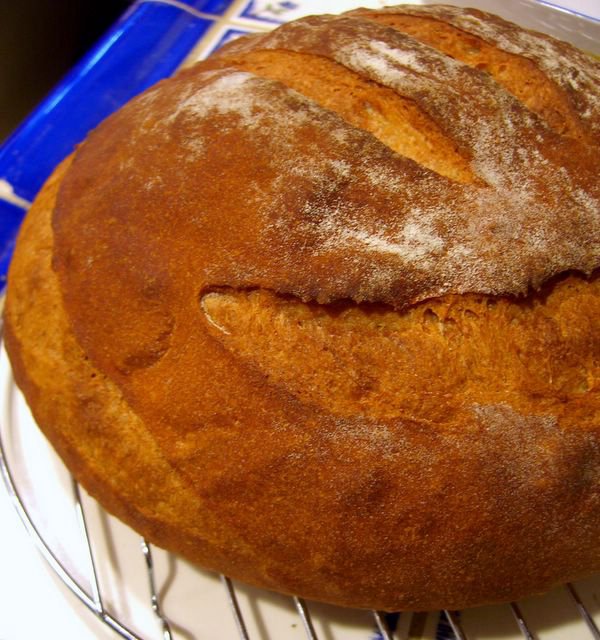
Pumpkin Oatmeal Bread

Despite the occasionally negative comments that I have heard about Beth Hensperger's Bread Bible, I (so far) have always had good results with it. Last week, when I was looking for a bread to make for Thanksgiving, I flipped through the book, looking for something that would be hearty but not too heavy to accompany the big meal. I had in mind that I wanted oatmeal in the loaf, since I had done an oatmeal bread last year with success.
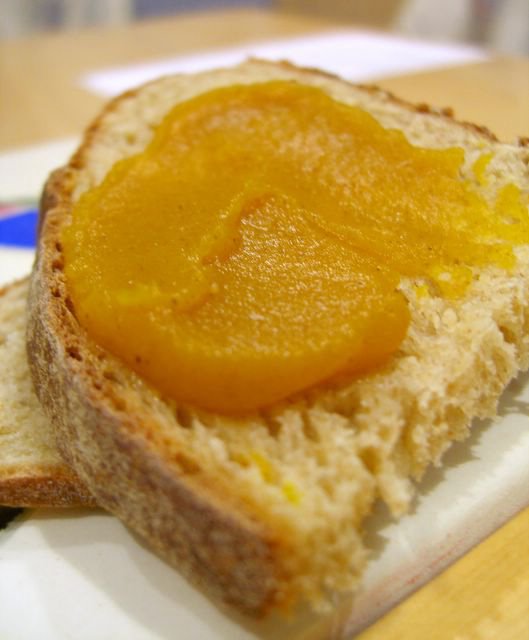
I settled on making a variation of Ms. Hensperger's Potato Oatmeal Bread, though I swapped out the potato in favor of using pumpkin puree. Adding pumpkin to a bread, I have found, can make it incredibly moist. It is usually very important to allow the bread to cool completely before slicing it, lest it befome gummy from the steam that will escape from a preemptive slice.
This bread was a snap to put together. The resulting loaves were soft, with a fairly tight and even crumb. There were no large bubbles. I cut it into big chunks to serve with dinner, but it also held up very well for slicing the next day. I am sure that it would have made fine rolls, but the baking time would have to be adjusted from the time I've given below.
Pumpkin Oatmeal Bread
1 ½ cups water, warm (110F), divided
1 tbsp active dry yeast
1 tsp sugar
½ cup milk, warm (110F)
¾ cup pumpkin puree, room temperature
1 tbsp salt
1 ½ cups rolled oats
1 tbsp butter, melted
5-6 cups ap flour
½ cup milk, warm (110F)
¾ cup pumpkin puree, room temperature
1 tbsp salt
1 ½ cups rolled oats
1 tbsp butter, melted
5-6 cups ap flour
Turn dough out onto a lightly floured surface and knead until smooth and elastic, before placing it in a lightly oiled bowl, covered with plastic wrap, to rise until doubled, 1 1/2 hours.
Turn risen dough gently out onto a floured surface. Divide dough in two and gently shape into two round or slightly oblong loaves. Place on an oatmeal dusted baking sheet and, covered with a clean towel, let rise for 45 minutes.
Meanwhile, preheat the oven to 375F.
Slash the top and sides of the loaves and bake for 35-40 minutes at 375, until loaves are browned and sound hollow when tapped. If you have an internal read/meat thermometer, it shoud read 195-200F when poked into the loaf through the bottom.
Allow to cool completely before slicing.
posted by Nic at
8:55 PM
![]()
![]()