Thursday, March 30, 2006

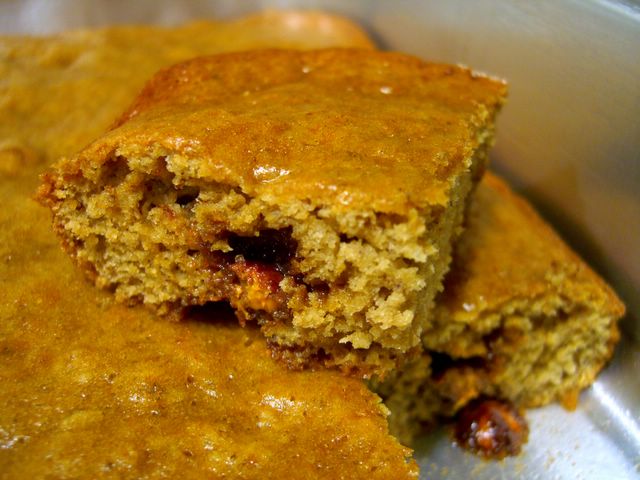
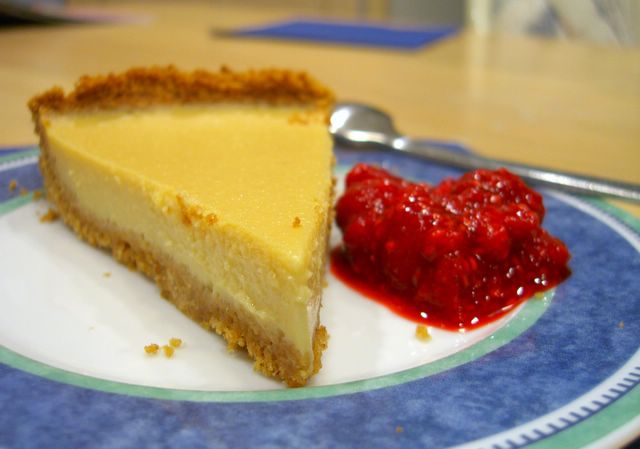
Cooking School: Mexican Chocolate Loaf Cake


Loaf cakes are not generally considered to be the most elegant cakes, but I love them. I think that having tall, rich-looking slices fall away from the loaf as you cut into it is beautiful. Come to think of it, I actually like all loafy baked goods, from savory yeast breads to sweet quick breads for breakfast. I think that loaf cakes are elegant and versatile.
Appearances aside, they do have other strong points. First, is portion size. It is extremely easy to slice a loaf into the perfect size for any appetitie. You can get 8 slices out of the loaf, or 16 for a group of light eaters. It's less intimidating than a whole round cake. It is also much easier to transport. If you wrap up a loaf cake with plastic wrap, you can carry it around like a football without worring about the cake cracking and breaking. This is a huge bonus if you want to take the cake to a friend's for dinner or to a party at the office.
This recipe is from Who Want's Seconds?, a beautifully photographed blog, and I've been meaning to make it for quite some time. I felt that the Mexican Chocolate Cake would do well as a loaf, developing a slightly crisp exterior and slicing into even, rich slices - and I was right. The only problem I had was with the amount of batter. Though a 9 x 5 x 3.5-inch loaf pan has the same capacity as the 9-inch round cake pan, I failed to realise that the "9-inch cake pan" mentioned in the original recipe was a square one and larger than the capacity of my loaf pan. I simply measured out four cupcakes worth of batter into a lined muffin tin and baked those off separately. The loaf, minus the cupcakes, had the perfect amount of batter.
The spicing in this cake was spot-on. The cinnamon flavor was present but not overwhelming in the least and there were subtle hints of coffee and orange that made it seem very exotic. The flavors blended well enough that when you took a bit of the cake you only thought of how tasty it was, not the individual spices. It was very chocolaty and I loved the fact that it is made with cocoa powder instead of melted chocolate. Not only does this help keep the cake from getting dense, but it has a lovely, bittersweet quality from the cocoa. I like it plain, like a pound cake, but feel free to serve it with whipped cream, if desired.


Mexican Chocolate Loaf Cake
(adapted from Who Want's Seconds?)
1 cup butter, soft
1/2 cup cocoa powder
1 tbsp instant coffee*
3/4 cup water*
2 cups sugar
2 large eggs
1/2 cup buttermilk
2 tsp vanilla extract
2 cups all purpose flour
1 tsp baking soda
2 tsp cinnamon
1/2 tsp salt
zest of one orange


Preheat over to 350F. Butter or grease a 9x5x3.5-inch loaf pan and dust with cocoa powder, knocking out the excess. Line 4 muffin cups with paper liners.
In a large, microwave-safe bowl, melt the butter. Whisk in cocoa powder until smooth, then add in instant coffee and water, whisking until dissolved. Stir in sugar, followed by the eggs, buttermilk and vanilla extract, mixing well after each addition.
In a medium bowl, sift together flour, baking soda, cinnamon and salt. Gradually add to cocoa mixture, stirring until just combined.
Using a 1/4 cup measure, fill the four cupcake liners about 3/4 full with batter. Pour the remaining batter into the prepared loaf pan.
Bake the cupcakes for 18-22 minutes, until a tester comes out clean.
Bake the cake for 55-65 minutes, until a tester comes out clean or with only a few crumbs.
Cool in the pans for about 15 minutes, then turn out cupcakes and loaf cake onto a wire rack to cool completely.
Makes 1 loaf cake and 4 cupcakes.
Serves 10-12, plus cupcakes for the cook.

*Note: You can omit the instant coffee and use 1/2 cup water with 1/4 cup coffee instead, as the original recipe calls for, if you don't have instant.

Wednesday, March 29, 2006

Fruit Kebabs and Honey Yogurt Dip


Fruit is something that we could all eat a little more of. As much as I love fruit, I tend to think of it as a morning or early afternoon snack, not as something substantial. For serious snacking, I generally turn towards savory foods, like pita chips, crackers and hummus. Fruit can be filling though, and it is likely to satisfy both your hunger and your sweet tooth – something that a salty snack won’t quite do.
These fruit kebabs are really fun. I had a great time making them for myself, but they are the sort of thing that a kid would love to have or make. You need a variety of fruits and some wooden skewers. The best fruits are firmer ones, like melons, pineapple, apples and berries. Bananas are great, too, but don’t forget to toss the slices with a little bit of lemon or orange juice to prevent them from browning too quickly. Brown bananas were always a huge turn off to me when I was young, though they do not bother me in the least now. On these skewers, I also have slices of ripe mango.
If you cut your fruit just right, you will have enough exposed surface area to use a small cookie cutter to cut the fruit into shapes. The main goal of cutting up the fruit is to have each piece be no larger than bite-size, but having a little bit of fun with the cookie cutters is worth it (especially with kids), when you have the chance.
The yogurt dip is what makes this more than just fruit on a stick. A dip makes something seem more complete, even more special or satisfying. I used my favorite nonfat Fage Greek yogurt, which is thicker than most regular yogurts and clings to the fruit a bit better. I sweetened the plain, slightly tangy yogurt with vanilla, cinnamon, honey and orange zest. The orange zest is the key ingredient in bringing all the flavors together in the dip. The sweetness of the honey, along with the hint of citrus, enables the dip to pair perfectly with the rest of the fruits, highlighting their natural sweetness.
Feel free to change the amount of each flavor to your tastes, increasing the honey if you want your dip to be sweeter, but be sure to include everything.


Sweet Honeyed Yogurt Dip
1 cup plaint yogurt (I used nonfat)
1/2 teaspoon cinnamon
1 tsp vanilla extract
1-2 tsp orange zest (1 orange)
3-4 tbsp honey

Combine all ingredients in a small bowl and whisk to combine. Serve chilled with fresh fruit kebabs.
Dip can be made in advance and stored in the refrigerator.
Makes about 1 cup.

Tuesday, March 28, 2006

Monkey Bars


As far as I can tell, "monkey bars" are a name that is sometimes applied to banana bread baked as a bar-type cake rather than in a loaf pan. The real distinction in this case between a "bar" and a "cake" is the thickness, as the banana bars are not as thick as a banana cake would be. Monkey bars are just a really cute name that I - along with hundreds and thousands of others - happen to like, so this recipe is one for them, rather than one for banana bars or something similar.
The base has a higher sugar to flour ratio than a lot of banana breads, which makes it a bit denser and more stable; the texture is bar-appropriate. These can be packed into lunches as a dessert or substitute for a cookie and they can also be toasted for breakfast. You'll probably note the chocolate chips that are evident in the piece above, which might not make it wholly breakfast-worthy for some. The chocolate chips are actually Milk Chocolate and Caramel Swirl chips made by Nestle. I wanted to use plain chocolate chips, but much to my astonishment, had none at home. These morsels tasted great, though. While too sweet on their own, they really blended well into the batter and gave the whole bar a surprisingly rich taste.
These bars only take a few minutes to whip up. I recommended using a food processor for the wet ingredients because this isn't the sort of bar that you want to have chunks of banana in. If you do, that makes it a bit more banana bread-like than monkey bar-like, but the choice is, ultimately, your own.


Monkey Bars
1 1/4 cups ap flour
1/2 tsp baking soda
1/4 tsp salt
1/4 tsp nutmeg
2 medium bananas (3/4 - 1 cup banana)
2 tbsp butter, melted
2 eggs
1 cup sugar
1 tsp vanilla extract
1/2 cup chocolate chips


Preheat oven to 350 F. Lightly grease a 9-inch square pan.
In a medium bowl, whisk together flour, baking soda, salt and nutmeg.
In the bowl of a food processor, blend bananas until smooth. Add in melted butter, eggs, sugar and vanilla and whizz until smooth and well-combined. Pour banana mixture into flour mixture and stir until just combined. Fold in chocolate chips.
Pour batter into prepared pan (it will be a thin layer).
Bake at 350F for 20-25 minutes, until a tester comes out dry.
Cool completely before slicing.
Makes 16 bars.

Sunday, March 26, 2006

Sunday Brunch: Yeasted Buckwheat Pancakes


Buckwheat pancakes are one ot the two types that most frequently appear on restaurant and diner menus, the other being buttermilk. As a kid, I always avoided them because I was suspicious of their darker brown appearance, but not I know better.
Buckwheat flour on its own has a strong and somewhat bitter taste, but it becomes very interesting and complex when used with other things. It is gluten free, so it often appears in gluten free cookery and baking. The bitter taste is fairly easily tempered by mixing the buckwheat flour with other ingredients. All-purpose flour (ap flour) will help rein it in, but one of the most commonly added flavors to buckwheat seems to be molasses, proably since it, too, has a strong flavor.
In any even, these pancakes are neither bitter nor overly sweet. The recipe comes from the Post-Gazette's recipe section, where they are called Cape Cod Buckwheat Cakes. I did add a bit of brown sugar to round out the final flavor. The pancakes come together very easily and taste delicious. They taste of lightly sweetened whole grains and are very, very light, in no small part because buckwheat flour is gluten free. I added blueberries, but fresh and dried, to the batter once I spooned some onto a hot grill. The blueberries added enough natural sweetness that I really didn't need a lot of syrup on the pancakes, but I preferred the dried slightly over the fresh.
Keeping with diner tradition, I actually went ahead and made these the size of dinner plates, but the recipe makes quite a few more normally sized cakes, even if they're not quite so impressive to look at.

Update: I don't know what happened that caused the recipe below to disappear, but it's back now!


Yeasted Buckwheat Pancakes
(adapted slightly from the Post Gazette's recipe)

2 cups milk (nonfat is fine), warm (110F)
1 pkg (2 1/2 tsp) active dry yeast
1 1/4 cups buckwheat flour
1/2 cup ap flour
1 tsp salt
2 tbsp molasses
2 tbsp brown sugar
1/2 tsp baking soda
1 large egg
Fresh or dried blueberries

Beginning the night before, stir together milk, yeast, buckwheat flour, all purpose flour and salt. Cover with plastic wrap and refrigerate overnight.
In the morning, stir in molasses, brown sugar, baking soda and egg.
Heat a lightly greased pan or griddle over medium-high heat and spoon batter on to produce pancakes of desired size (I made plate-sized ones). Add blueberries to pancake on griddle. Cook until pancakes beging to bubble and look slightly dry at the edges, then flip and cook the remaining side until golden.
Serve immediately, with butter or maple syrup, as desired.

Serves 4, depending on appetite.

Friday, March 24, 2006

IMBB #24: 30-Minute Banana-Black Bean Tacos


I know that not every food blogger will feel this way, but I like Rachael Ray. I actually met her, albeit at a book signing, about a year ago. She's just like she is on her shows: happy, cheerful and full of smiles. I belive that she is 37, but she seems younger. In any event, even if you aren't a fan of her perky nature, she has done a lot for home cooking. For many years, even if people wanted to cook for their families, they couldn't spare the time or they thought they couldn't spare the time. Now, people are encouraged by seeing quick and delicious meals on TV and are getting back into the kitchen. I like Rachael for that.
For this Is My Blog Burning event, hosted by Too Many Chefs, the theme was make a meal in 30 minutes. I was tempted to use a Rachael Ray recipe, since I do have more than one of her books (and a signed one, no less), but I decided to go with something a little more unusual. I started browsing Epicurious and came up with their recipe for Banana-Black Bean Empanadas. It involved caramelised banana slices and spiced, mashed black beans stuffed into a golden, crispy empanada - delicious and a little out of the ordinary, with a bit of caribean flair. But the recipe took more time than I was prepared to spend, not to mention that fried puff-pastry anything is something that I would rather save for a special occasion than have as a weeknight supper. I took the filling and wrapped it into homemade corn tortillas. I've had a lot of practice rolling tortillas, so the whole thing took me less than 20 minutes. If you use store-bought corn tortillas, you can have dinner on the table in 15.
Did I mention that they taste good, too? I loved the sweetness of the bananas and how they moistened the bean filling. I also loved the crisp, caramel-y edges of the bananas that had been seared into the pan.
I doused the tacos with some chipotle salsa before serving. Delish.


Banana-Black Bean Tacos
(adapted from Epicurious)
1 tbsp vegetable oil
1 medium banana, firm, but ripe
1 15-ounce can black beans, drained
3/4 cup onions (1 small)
1/4 cup cilantro or 1/2 tsp coriander
3/4 tsp cumin
1/4 tsp cayenne pepper
salt and pepper, to taste
8 6-inch Corn tortillas
montery jack cheese, for serving
salsa, for serving

Heat vegetable oil over high heat, dice banana while heating. Add banana to skillet and cook for about 2 minutes, until golden.
While banana cooks, dice onion. Remove banana from skillet and set on a paper towel to drain. Add onion to skillet and reduce heat to medium. Cook onion until tender, about 3 minutes. Add beans, cilantro, cumin and cayenne and cook until heated through. Mash beans with back of fork and add salt and pepper to taste.
Place about 1/4 cup beans in each tortilla and top with caramelised bananas, as well as cheese and salsa, if using.
Makes 8 tacos.

Tagged with: +

Thursday, March 23, 2006

Cooking School: Rustic Country Bread


There are times when the best recipe is the most straight-forward. I mean, there are many breads that pair perfectly with different types of meals. For example, you might only like challah (link) for french toast and might perfer a hearty rye bread (link) for soups. A lighter loaf, like honey buttermilk or wheat (links), could be your prefered bread for sandwiches. This bread can be used for all of that. It is a simple, suprisingly flavorful white bread that is outstanding for everything from mopping up soups to making toast, though it may have to be trimmed to fit into your toaster.
I will also take this opportunity to mention how important it is to follow all the steps of a bread recipe. Generally, the process is as follows: mix, knead, rise, knead/shape, rise, bake. The trickiest part is the kneading and shaping after the first rise. When the dough is mixed, you want to handle it firmly, kneading vigourously to develop the gluten and produce a satiny, elastic dough. After that first rise, the dough must be handled more gently. Air pockets have developed in the dough and, to achieve the best textured bread, you do not want to force them out. On the other hand, the air pockets will be irregularly distributed and overly large if you skip this step and go straight into a second rise. This is why the majority of bread recipes instruct you to "gently deflate" the dough after that first rise. It lets out excess air and distributes the rest evenly. It also makes the dough easier to shape. Shaping takes practice and nothing else will be able to completely compensate for experience.
What happens if you don't deflate the dough? Click here to see. In my bread, I "shaped" it too gently - by which I mean that I didn't shape it at all - and got a huge pocket in my final result. I took it, very, very gently, from the bowl it was rising in and placed it on a cookie sheet to rise again. This probably won't happen with your bread and I have since made this loaf many times without problems, so don't worry about getting a strange outcome like this one. But it does illustrate my point that gently deflating is necessary.
This bread also has a sponge, which means that the yeast is given extra time to ferment before being added to the dough. It adds an extra step at the beginning of the recipe, but doesn't change anything about kneading and shaping the dough.

Rustic Country Bread
Sponge:
1 tbsp active dry yeast
1 cup water, warm (110F)
1 cup bread flour
Dough:
5 cups bread flour, approximately
1 1/3 cups water, warm (110F)
2 tbsp honey
1 tbsp salt


Make the sponge:
Dissolve yeast in warm water and stir in flour. Let rest for at least one hour (or up to 5, as time permits).

Make the Dough:
In a large bowl, combine the sponge, 2 cups of flour, water, honey. Add salt and remaining flour, stirring in about 1/4 cup at a time until the dough comes together into a ball. Turn out onto a lightly floured surface and knead until elastic - about 5 minutes. Place in a lightly greased bowl to rise until doubled, about 1 hour.
Turn dough out onto a lightly floured surface and gently deflate. Shape into a ball and place on a baking sheet sprinkled lightly with cornmeal. Flour the top of the loaf and cover with a clean dish towel. Let rise for 45 minutes.
Preheat oven to 450F.
Bake for 35-40 minutes until the crust is dark brown. An instant read thermometer (meat thermometer) inserted into the bottom of the bread will read 205-210 F.
Cool completely on a wire rack before slicing.

Makes one large loaf.

Note: I don't generally do this, but if you oven is large enough, add a small pan of water to the very bottom rack, below the bread, to create steam while the bread cooks. This will produce a better crust.

Wednesday, March 22, 2006

Orange Pudding Cake


I really like pudding cakes. The combination of the light, moist cake layer with the bubbling sauce underneath is just delightful. I like the fact that you never need an extra topping or garnish with a serving of pudding cake (though whipped cream would work, if you like), either. I also like the fact that this dessert dessert is relatively low in fat. Using whole milk will make it richer, but it's not necessary.
Pudding cakes only take about 5 minutes to put together and can be served almost straight from the over. Personally, I don’t mind waiting about 10 or 15 minutes, since I don’t like to burn my tongue, but it’s entirely up to you.
Orange is a nice change from the more typical lemon and chocolate pudding cakes because it’s a little bit different. The vanilla flavor comes through a bit more strongly and the whole thing is light and sweet. There is less of a tang than in the lemon pudding and less dense richness than in the chocolate pudding. I also like variations on a theme, since this is essentially the same recipe as the lemon pudding cake. It means that I have more dessert options without having to deal with a whole new recipe.


Orange Pudding Cake
(adapted from All American Desserts)
2 eggs, separated
1/4 cup fresh orange juice (I used blood orange)
2 tsp orange zest
2/3 cup milk (I used nonfat)
1 tsp vanilla extract
1 cup sugar
1/2 cup ap flour
1/4 tsp salt
Preheat oven to 350F.
Place a 9-inch cake pan, filled with about 3/4 inch of water, into the oven. Grease a 1 quart (4 cup) souffle dish and set aside.
In a large bowl, whisk together sugar, flour and salt. Add in egg yolks, orange juice, orange zest, milk and vanilla, and whisk thoroughly.
In a medium bowl, beat egg whites to soft peaks. Stir or fold egg whites gently into lemon mixture, until well combined. Pour mixture into prepared souffle dish and gently place in water bath.
Bake for 45-50 minutes, until the cake has risen and begun to pull away from the sides of the dish. Serve warm.
Serves 4.

Monday, March 20, 2006

Peanut Butter Chocolate Chip Scones


Peanut butter can go on scones, but isn't usually a part of the scone. It is a fairly dense product and the goal of a scone is to be light and tender. If you treat the peanut butter like butter, however, and cut it in to the flour mixture, you can create a scone that is not only tender but that has a peanut butter flavor.
The peanut butter flavor is not as strong as it would be if you simply smeared a few tablespoons of peanut butter onto your scone because it is incorporated with the flour and the butter, so it is possible that someone tasting these might simply think that they were eating an unusually rich-tasting scone without identifying the source of the flavor. The majority of people, though, will recognise the peanut butter flavor. They'll like it, too.
A food processor is the best way to bring all the ingredients together in this recipe because the peanut butter is a bit hard to handle by hand. If you have one of those tools that is used to cut butter into flour, that will work, too. Try not to use your fingers.
These scones are light, with a definite melt-in-your-mouth quality from all the butter and peanut butter in them. Make a batch and take them into the office to share with your coworkers. They make great snacks and are less suited to putting butter or cream on them, though I suspect you could get away with jelly or jam, should you be so inclined. The mini chocolate chips add just the right amount of chocolate, in my opinion, and I would recommend using them instead of full-sized chocolate chips if you can get them. They're delicious!


Peanut Butter Chocolate Chip Scones
3 cups ap flour
1 tbsp paking powder
1/2 tsp salt
1/4 cup sugar
10 tbsp butter, cold and cut into 10 pieces
4 tbsp peanut butter
1 1/8 cup milk (1 c + 2 tbsp)
1 tsp vanilla extract
1/2 cup mini chocolate chips


Preheat oven to 400F. Line a baking sheet with parchment paper.
In the bowl of a food processor, combine flour, baking powder, salt and sugar. Pulse to combine. Add butter and peanut butter and pulse a few times, until mixture resembles very large, coarse crumbs. Add mini chocolate chips.
Combine milk and vanilla extract. With the motor of the food processor running, pour in milk. Stop when the dough starts to come together into a ball. Try not to fun the food processor any more than necessary.
Divide dough into three or four pieces and pat each piece into a circle on a lightly floured surface. Cut each circle of dough into 4 or 5 pieces, to make 16 triangular scones. Place on prepared baking sheet.
Bake for 16-20 minutes at 400F, until light golden brown.
Cool on a wire rack. Store in an airtight container if not eating right away.
The scones are best within two days of baking made.
Makes 16 scones.

Saturday, March 18, 2006

Accidental Blood Orange Jelly

Don't be fooled by the title of this post. I didn't accidentally cut myself as I worked, or anything in that vein. My result here was a happy accident, or perhaps discovery would be a better word, and the blood comes from the blood oranges that I used. There are several varieties of blood oranges and some are more red on the inside than others. The ones I used for juice here were nearly black, resulting in this delightfully colored jelly. Other blood oranges will work perfectly well, but the result will probably be more orange than pink.
This jelly came about because I wanted to make a blood orange version of Donna Hay's lemon souffles, which I have made in a lime version already. For the souffle base, citrus juice is cooked with sugar and thickened with cornstarch. The mixture chills in the refrigerator before being folded into egg whites and baked. The blood orange base seemed to thicken more than the lime base, possibly due to the presence of more natural sugars in the orange itself. It was firm and silky smooth after a few hours in the refrigerator. I dipped a knife into it and felt a remarkably jelly-like texture. To test it, I spread it onto a few crackers and then I decided that I didn't need to make a souffle after all.
I really liked this as a jelly/jam. It was sweet, with a slight zing from the citric acid in the orange juice. The little crackers in the photo are appetizer crackers that I picked up at Trader Joe's, but this was really best on toast. After about a week in the fridge, the leftovers seemed to separate a bit, so I recommend using this within a few days. This is, in my opinion, a small price to pay for something that tastes so good. And a few more pieces of toast and jam never hurt anyone. Besides, you can always make a souffle with the leftovers.

Quick Blood Orange Jelly
7 ounces (200mL) fresh blood orange juice
3 tbsp water
1 1/3 cup sugar
2 tbsp cornstarch
2 tbsp water

In a medium saucepan, whisk together orange juice, water and sugar. Bring to a boil. Meanwhile, thoroughly combine cornstarch with 2 tablespoons of water in a small bowl. Whisking constantly, pour cornstarch mixture into orange syrup and continue cooking for about 2-3 minutes, until thickened. Transfer to a bowl, cover with plastic wrap and refrigerate until cool and set.

Store in the refrigerator. To make souffles, use 1/2 recipe.

Thursday, March 16, 2006

Cooking School: Irish Soda Bread


Irish soda bread is dead easy to make. It can have as few as four ingredients and uses no yeast, relying instead on the reaction between baking soda and buttermilk for leavening. This produces a reliable rise every time, no matter how inexperienced you are are baking. The four base ingredients are flour, buttermilk, baking soda and salt.
Irish soda breads are slightly denser than most breads because they have no yeast. They do no have the means to develop any of the nice, open holes that can be seen in, for example, french baguettes. The loaves are very quick to make, however, and the slight denseness makes them tasty and unique. Ths hearty bread pairs well with soups and meat dishes. The crust that develops as it bakes means that it makes outstanding toast, too.
Another good thing about soda bread is that it is versatile, especially in terns of flavors. While the base can be very plain, you can add carraway, which is fairly traditional, or currants for a sweeter bread. I like adding a mixed variety of raisins to mine and a pinch of sugar, which helps with browning. Some people use all whole wheat flour in their soda breads and others like to keep them lighter by using only all-purpose flour. While any combination of all purpose and whole wheat flours will work, the best variation, in my opinion, uses 1 1/4 cups all-purpose flour, 1/2 cup whole wheat flour and 1/4 cup oat flour. The whole wheat flour gives it a distinctive taste and the oat flour keeps the bread a little bit moist.
Whip this up when you walk in the door after work and let it cool while you prepare dinner. The bread should be cooled completely or almost completely before slicing.

Irish Soda Bread
2 cups flour (all purpose or half whole wheat*)
1 tsp baking soda
1/2 tsp salt
1 tbsp brown sugar
2 tsp caraway seeds (optional)
1/2 cup raisins
7/8 cup buttermilk (plus 1 tbsp, if necessary)

Preheat oven to 400F.
Stir together flour, baking soda, salt, sugar and caraway seeds. Stir raisins into the flour mixture. Pour in buttermilk, adding an additional tablespoon, if necessary, and mix into shaggy ball.
Place dough on a lightly floured surface and knead four about 2-3 minutes until the ball is fairly smooth. Form into a 6-inch, rounded ball and place on a parchment lined baking sheet. Cut a deep cross in the top with a sharp knife.
Bake 32-35 minutes, until the top is well browned. A toothpick will come out clean when inserted into the center.
Cool almost completely on a wire rack before slicing.
Makes 1 loaf, serves 6-8.


*Nic's favorite flour combination, pictured above: 1 1/4 cups all-purpose flour, 1/2 cup whole wheat flour and 1/4 cup oat flour

Tuesday, March 14, 2006

Buttermilk Pie for Pi(e) Day


Today is Pi(e) Day - so named because March 14th (3-14) corresponds to the mathematical concept of "pi" (3.14). Can you tell that I liked math in school? Actually, back in high school we always celebrated this day in my math classes. While I don't want to come right out and admit how much of a math geek I was, I will say that I had more than a minor familiarity with pi and just about every variety of pie that Marie Callendar's made at the time. Needless to say, I have harbored a soft spot for the date ever since and have always tried to have some pie in celebration.
This year I went with something that is a Southern Classic, but new to me: Buttermilk Pie. Fruit pies have always been my top choices and apple pie will always be my favorite, but this pie was incredibly delicious. The filling had a rich, slightly butterscotch flavor and a hint of tang from the buttermilk. It was very smooth and creamy, but much more substantial than most custards. It was also not heavy in the least, reminding me more of a clafoutis than of a cream-type pie. In short, the pie is not only outstanding but also unique.
I paired the filling with a graham cracker crust. The sugary crunch of the crisp crust was ideal for setting off the filling. I don't generally have problems making regular pastry light and flakey, but pie crusts can be tricky and making a graham cracker crust ensures that the base of your pie will melt into your mouth, just as the filling does.
The raspberry sauce that is pictured with the pie was an inspiration from Martha Stewart. I made it by mashing about 1 cup of raspberries with a fork and tossing them in a small saucepan with a tablespoon of sugar to cook for about 2 minutes. It isn't impressive alone, but sets off the pie quite nicely for a variation on the plainer pie.


Buttermilk Pie
1 graham cracker crust, recipe follows
2/3 cup brown sugar
3 tbsp ap flour
1/4 tsp salt
3 large eggs
1 tsp vanilla extract
1/8 tsp nutmeg, freshly grated
1 tbsp butter, melted (optional)
1 1/2 cups buttermilk


Preheat oven to 350F.
In a food processor, combine brown sugar, flour and salt and pluse a few times. Add eggs and whizz until well combined. Add vanilla, nutmeg, butter (if using) and buttermilk and process for about 20 seconds, until very smooth.
Pour into prepared graham cracker crust, taking care not to over-fill the pie.
Bake at 350F for 30-35 minutes, until just set.
Allow to cool completely on a wire rack.
Serve chilled or at room temperature.
Makes 1 pie; serves 8-10.


Graham Cracker Crust
8 large grahams crackers (to make 1 1/4-1 1/2 cups graham crumbs)
1/4 cup sugar
1 tsp vanilla extract
1/4 cup butter, melted


Preheat oven to 375F.
In a food processor, whizz graham crackers until reduced to crumbs. Add sugar and pulse to combine. Pour in vanilla and melted butter and process until crumbs are all moistened.
Press firmly and evenly into a 9-inch pie plate.
Bake for 8-10 minutes at 375F, until browned at the edge.
Set aside to cool.

Monday, March 13, 2006

Cocoa Fudge Cookies


I found this recipe in an older issue of Cooking Light magazine that I happened to be flipping through. Apparently there is a good reason to save all those old issues, because this recipe makes delicious cookies. I know it's listed on their website and has been included in their Christmas Cookie recipe collection at least once, too, so a subscription isn't crucial to getting your hands on recipes like this one.
After another look, I realised that this was an Alice Medrich recipe and I wasn't suprised the cookies were so good. Alice Medrich is probably the queen of chocolate, and her recipes always come out winners. The cookies were soft and rich, tasting just like brownies. They were phenominal right out of the oven, but for anyone worried about burning their tongue, the kept well for several days.
The chocolate flavor of the cookies was quite intense and they were not particularly sweet. In addition to the plan version given in the original recipe, I also made two variations using dried tart cherries and mini chocolate chips. The mini chocolate chips were extremely good and very, very chocolatey. The whole thing just melted into my mouth, although the cookies still had a plesant amount of chew and were neither heavy nor greasy. I also really liked the cookies with the tart cherries. If you can find them, try using dried tart cherries in these, but for a real chocolate fix, use the mini chocolate chips.


Cocoa Fudge Cookies
(from Cooking Light, recipe by Alice Medrich)
1 cup ap flour
1/4 tsp baking soda
1/8 tsp salt
1/4 cup butter, room temperature
7 tbsp cocoa powder (unsweetened)
2/3 cup sugar
1/3 cup brown sugar
1/3 cup plain yogurt
1 tsp vanilla extract
1/2 cup dried tart cherries (or mini chocolate chips)

Preheat oven to 350F.
Whisk together flour, baking soda and salt in a small bowl.
In a large, microwave-safe bowl, melt the butter in the microwave. Stir in cocoa powder and sugars. Stir in yogurt and vanilla extract. Add flour and mix until just combined. Stir in cherries or mini-chocolate chips, if using.
Drop tablespoonfuls of batter onto a parchment lined baking sheet. Press down slightly to flatten; cookies do not spread a lot.
Bake at 350F for 9-12 minutes or until set and slightly firm at the edges. Allow to cool on the pan for a few minutes before transferring to a wire rack to cool completely.
Makes 2 dozen.

Sunday, March 12, 2006

Crispy, Roasted Brussel Sprouts


Who knew that brussel sprouts could be so delicious? In fairness, I know that lots of people enjoy these little green veggies, but I think that we can all agree that they are not the most universally popular food. Until fairly recently, I hadn't eaten sprouts in years. They didn't appear all that often on menus and I never really thought to purchase them. I remembered having them once or twice as a child - both times when they were doused in butter and parmesan cheese - and liking them well enough, but what doesn't taste good when covered in cheese?
Since I have gotten into the habit of roasting a great number of vegetables, I figured that I would try brussel sprouts that way. Once I popped one of the crispy, tender sprouts into my mouth, warm from the oven, I realised that I would never resort to the cheese trick again. Brussel sprouts taste a bit like cabbage, but have a less assertive flavor. It is at once enhanced and softened by the roasting.
I think that salt and pepper is all you need for these, but a little dressing to dip them in wouldn't hurt anything, either. This recipe will work with any amount of brussel sprouts.


Oven Roasted Brussel Sprouts
brussel sprouts
olive oil
salt and pepper


Preheat the oven to 400F.
Slice the sprouts in half lengthwise, removing any loose, outer leaves and trimming the bottom stems.
Toss sprouts in a little bit of olive oil and add salt and pepper, to taste. Spread cut side up in a single layer on a foil-lined baking sheet.
Bake 400F for 30-40 minutes, until browned.
Serve immediately, or store in the fridge for lunch the next day.

Friday, March 10, 2006

SHF #17: Strawberry Shortcakes with Mascarpone Cream


This recipe makes the best filling I've had in a long time and certainly the best I can remember on a strawberry shortcake. Generally speaking, I don't go for fillings in cake in a big way. I like them well enough, but I'm content with cake and fruit or jam rather than a big thick layer of frosting. Strawberry shortcakes always sound promising, but end up being disappointing more often than not.
There are many ways to make a strawberry shortcake. You can start with a base of any type of cake you like - sponge cake or butter cake for example - but to me, a biscuit is the best base. With a biscuit, you have added texture in your dessert and it is much less time consuming to make than an actual cake. The biscuit is really a sort of drop scone, with butter rubbed into the flour mixture. Cream is added to bind everything together and the biscuits are baked. I added some poppy seeds for a bit of crunch and because I like the way they look; they don't really add flavor to the biscuit. You can use milk instead of cream in the biscuit, but you'll notice that there is not too much butter in the recipe. This will make a leaner biscuit overall, so take care not to overbake if you do choose to use milk, since they might dry out a little bit. If the resulting biscuit ends up being a bit too dry for you, just make sure you put enough of the cream filling inside!
The biscuit is filled with cream and strawberries. A simple whipped cream is the most popular filling, but the mascarpone cream blows it out of the water. The dairy-based filling also makes this a perfect entry for this month's Sugar High Friday, since Andrew picked dairy as the theme. You can see that I stacked my shortcakes, but these are also very good if you simply split the biscuits, spread them with cream and top with strawberries - no stacking required. This also eliminates the need for a knife to cut into these treats.

Strawberry Shortcakes with Mascarpone Cream
1 cup plus 2 tbsp all purpose flour
2 tsp baking powder
1/4 tsp salt
2 tbsp sugar
1 tbsp poppy seeds (optional)
2 tbsp butter, cold
1/2 cup light cream (half & half)
1 tsp vanilla extract
1/4 tsp almond extract

In a medium bowl, combine flour, baking powder, salt, sugar and poppy seeds. Add butter and rub in to flour mixture, creating coarse crumbs.
In a small measuring cup, combine cream, vanilla extract and almond extract. Add to flour mixture and stir with a fork until a ball of dough forms. Add an additional tablespoon of milk, if necessary.
Divide dough into four and place on a baking sheet. It is not crucial to shape the dough, but it's better if your shortcakes are on the round side, for presentation.
Bake at 400F for 15-18 minutes, until lightly golden and somewhat firm to the touch.
Allow to cool completely on a wire rack.


Mascarpone Cream Filling
12-ounces mascarpone cheese, cold
1/4 cup light cream (half & half)
4 tbsp powdered sugar, or to taste


Beat all ingredients together with a whisk until soft peaks form. If you want to make the filling sweeter, then add a bit more sugar. You might have to add a little more cream to keep the filling from getting too stiff.


Assembly
Strawberries, diced

Split cakes horizontally in half and spread on mascarpone filling. Top mascarpone cream with strawberries and, if desired, more cream.

Serves 4

Thursday, March 09, 2006

Cooking School: Lemon Sherbet


At one time, sorbet and sherbert were the same thing: a frozen concoction of fruit juice, sugar and water, sometimes with additional flavoring added. Generally speaking, however, sherbet is no longer considered to be a type of sorbet, but rather a cross between it and ice cream. Sherbet is made from fruit juice and sugar, but also has an amount of milk, cream or an egg white added to it to improve the consistency. Sherbet is very often not pronounced as it is spelled, with people tending to say "sher'-bert" as opposed to "sher'-bet". The former pronunciation is not incorrect; it is just different and, in my opinion, more pleasing to the ear.
The defining characteristic of sherbet is that it is very refreshing, though much less aggressive than a sorbet or granita because its flavor is tempered by the dairy in it. This makes sherbet a perfect vehicle for citrus fruits, which can be overpowering on their own. Orange is the most popular choice, but any classic American ice cream store worth their salt will have rainbow sherbet, which contains layers of orange, lime and strawberry sherbets.
This sherbet is a lemon one. It is best when you first churn it in your ice cream maker and then let it firm up for a couple of hours in the freezer before eating. Before freezing completely, it tastes just like those slushy lemonade drinks that you can get at fairs and theme parks, but much better. An ice cream maker will definately give you the best results when making this recipe as the ice crystals will be small and evenly distributed, but pouring it into a freezer safe container and stirring it every 30 minutes or so until it is frozen will still produce a fairly good result.
The sherbet is creamy and delicate. It is sweet but has a sharp lemon flavor that becomes more noticeable the more you eat, so it is best to serve this in small portions. If you eat too much, you'll probably feel your taste buds start to tingle. I would not recommend reducing the amount of sugar because the texture of the dessert will start to suffer. This sherbet is incredibly refreshing and an excellent end to a heavy meal or a sweet way to finish off a summer barbecue.


Lemon Sherbet
2 cups strained lemon juice
1 cup sugar
1 cup light cream (half n' half)
1 cup milk (low fat is fine)


In a small sauce pan, dissolve sugar in 1 cup of the lemon juice, only heating until sugar is dissolved. Combine all ingredients (don't worry if the milk looks curdled when you combine it with the lemon juice) and pour into your ice cream maker. Freeze according to directions, about 30 minutes.
Store in an airtight container in the freezer.

Wednesday, March 08, 2006

Mozzarella Stuffed Dinner Rolls


Everyone likes a dinner roll with dinner. Everyone except people who eat only low carb, I guess, and you might even be able to convince them to eat these because of the cheese inside. Each of these dinner rolls has a lump of warm, melted mozzarella inside. They go well with salad and soups, but are the best with a bowl of pasta topped with marinara, where they can be used to soak up all that delicious extra sauce.
I used those neat little balls of fresh mozzarella that are packed in tubs of water at the grocery store. Simply cut them in half and stick them into the rolls. It's actually important not to use too much cheese, since it will just run out of the dough. Rolls are a much better shape option than breadsticks, which you can see I tried in the photo above. The round rolls held the cheese much better than the sticks did.
I topped all of the rolls with either coarse sea salt or garlic salt. Personally, I prefered the plain sea salt to top them over the garlic salt, but it's a matter of individual preference. The salt really brought out the flavor of the cheese and I think it's necessary to a good roll.
These are really quick to make. you can do start them at 4:30 and pull them out of the oven in time for dinner. Of course, you'll have to watch that you don't burn your tongue on the cheese, but it's a small price to pay for warm, fresh dinner rolls .


Mozzarella Stuffed Dinner Rolls
2 1/2 tsp active dry yeast (1 packet)
1/2 cup water, warm (110F)
1/2 cup milk, warm (110F)
1 tbsp sugar
1 tsp salt
2 - 2 2 1/2 cups ap flour
12, 3/4-inch cubes of fresh mozarella cheese
coase sea salt or garlic salt to top

In a large bowl, combine yeast and water and let stand for 5 minutes, until slightly foamy. Add milk, sugar, salt and 1 1/2 cups of flour, stirring well. Add the remaining flour gradually, stirring until the dough comes together into a ball, away from the sides of the bowl. Turn out onto a lightly floured surface and knead until very smooth and elastic, about 5 minutes. Place in a lightly greased bowl to rise until doubled, 50-60 minutes in a warm kitchen.
Turn dough out onto a lightly floured surface.
Divide dough into 12 equal pieces and shape each into a round. Place a square of cheese inside each dough round and pinch tightly to seal. Place seam side down on a parchment-lined baking sheet and cover with a dish towel for about 15 minutes.
Preheat the oven to 375F while rolls rest.
Brush rolls with a little water and sprinkle with coarse salt or garlic salt, if you prefer. Bake rolls for 18-20 minutes, until golden.
Serve right away, as the cheese is best warm. Don't worry if it leaks out onto the baking sheet; the rolls will still taste great.
Makes 12 rolls.

Monday, March 06, 2006

Spiced Pumpkin Muffins


After having some good success with my Eggless Chocolate Bundt Cake, I wanted to try applying the same technique to other recipes. The cake had such a moist, soft, light texture that it is now one of my favorites. The best part is that no one ever suspects that it is different tha other chocolate cakes, only that it tastes really good.
I decided to apply the same vinegar instead of egg technique to muffins. I was hoping to achieve something light and high rising, in addition to being tasty. Muffins are often heavier an dense than other kinds of cake. There isn't anything wrong with that, though. In fact, it can be quite delicious, but a lighter muffin is a nice change. The substitution worked out perfectly. The muffins were light and delicious.
I love using pumpkin in muffins because it makes them very moist, much like using applesauce. These muffins were much dense than some typical muffins, perfect for afternoon snacking in addition to breakfast. These travel well, but should be stored in a airtight container if you are not going to eat them all in a day or two. They also freeze quite well. If you use chocolate chips instead of raisins in the muffins, you could even have these as a light dessert.


Spiced Pumpkin Muffins
2 cups ap flour
1 tsp baking soda
¼ tsp baking powder
¼ tsp salt
2 tsp pumpkin pie spice
¾ cup brown sugar
2 tbsp butter, melted
¾ cup milk (low fat or fat free is fine)
½ cup pumpkin puree
1 tsp vanilla extract
1 ½ tsp apple cider vinegar
½ cup raisins (or chocolate chips)

Preheat oven to 375F and line 12 muffin cups with paper liners.
In a large bowl, whisk together flour, baking soda, baking powder, salt, pumpkin pie spice and sugar.
In a medium bowl, whisk together melted butter, milk, pumpkin puree, vanilla extract and apple cider vinegar. Add wet ingredients to flour mixture and stir until almost combined. Quickly stir in raisins (or chocolate chips) and spoon evenly into prepared muffin tin.
Bake for about 15 minutes at 375, or until tester comes out clean.
Remove from tin to cool on a wire rack.
Makes 12 muffins.

Sunday, March 05, 2006

Sunday Brunch: Bacon Pancakes with Chocolate Chip Variation


Most pancake breakfasts in restaurants are served with a side of bacon. In some of the larger portion establishments, the pancakes come with eggs and toast as well. I don't know about you, but once I'm being served a meal that takes up three plates, the likelihood that I will be able to finish it decreases dramatically. So let's forget the eggs and toast and cut right to the core of the meal: the pancakes and the bacon. Grains, proteins, maple syrup - sounds balanced to me.
In the interest of convenience, I have combined the pancakes and bacon into one food item, streamlining the breakfast process.
I really love this pancake recipe. The pancakes are light and fluffy, not to mention incredibly delicious. They are easy to whip up and, best of all, are basic enough to be subject to multiple variations. I have a chocolate chip version before, pictured below, in addition to the bacon pancakes.


The main difference between the two types is the mixing. The bacon should be mixed into the buttermilk batter and the chocolate chips should be dropped on top of the pancake while it is cooking on one side. The reason for this is that chocolate, as it melts, may leak out onto the grill, making it much more difficult to produce a clean pancake. In addition, the chocolate might burn if it is left on the heat. The worst that can happen to the bacon is that it will become more crisp - which isn't all that bad.
Keep the vanilla in the pancakes whether you are making the bacon or the chocolate chip variety. Trust me. The ever so slight flavor in the bacon pancakes makes them much more delicious. Maple syrup is optional, as you don't really need it for either variation.

Buttermilk Pancakes with Bacon
(with a chocolate chip variation)
1 cup all purpose flour
1/2 tsp baking powder
1/2 tsp baking soda
1/4 tsp salt
1 egg
1 cup buttermilk
1 tsp melted butter
1 tsp vanilla extract
about 1/2 cup bacon, cooked until crisp and coarsely chopped

In a large bowl, mix together flour, baking powder, baking soda and salt.
In a small bowl, whisk together egg, buttermilk, melted butter and vanilla. Pour wet ingredients into flour mixture along with the bacon and stir until combined but a little bit lumpy to avoid over mixing.
Heat a lightly greased skillet over medium-high heat. When a drop of water sizzles on the surface, drop heaping spoonfuls of batter onto the skillet, making 3-inch pancakes. Cook until golden brown on each side, flipping only once.
Serve immediately, with maple syrup, if desired.
Makes about 15 pancakes.
Serves 3-4.

Friday, March 03, 2006

Black and White Chocolate Chunk Cookies


Not to be confused with the Black and White cookie of Seinfeld fame, these cookies have chunks of both black and white chocolate in them. And in this case, "black" chocolate means bittersweet (about 63% cacao) to contrast with the sweetness of the white chocolate. Milk chocolate would not be a good match in these.
Chopping chocolate is fun when you have a chipper. Chocolate chippers look like small pitchforks and are the best way to chop chocolate. A bit of pressure on the chipper and the prongs puncture the chocolate, causing small pieces to shatter off. Unlike using a knife, the risk of cutting yourself with this tool is very small, even with very hard chocolate. White chocolate cuts easily, though, since it is relatively soft due to the high cocoa butter content.
With the large amount of chocolate that is in them, the cookies are lovely. They are buttery, crisp on the edges and softer in the center. The batter is stiff, so it is helpful to use some sort of electric mixer rather than attempting to to them by hand. Baking the cookies for a minute longer will produce crisper cookies, while a minute less will give you much chewier ones. They have a subtle caramel flavor in amongst the chocolate pieces, but chopping the chocolate yourself means that there will be tiny shards of chocolate flavoring the cookies in addition to the larger chunks. In total, there will be a little more than a cup of each type of chocolate added to the batter. The chocolates balance each other out wonderfully, but these are sweet cookies. Fortunately, cookies are best when they're sweet.


Black and White Chocolate Chunk Cookies
2 1/4 cups ap flour
1/2 tsp baking soda
1/2 tsp baking powder
1/2 tsp salt
3/4 cup unsalted butter, very soft
1 cup brown sugar
1/2 cup sugar
2 large eggs
2 tsp vanilla extract
6-ounces dark/bittersweet chocolate, chopped
6-ounces white chocolate, chopped


Preheat oven to 350F.
In a medium bowl, whisk together flour, baking soda, baking powder and salt.
In a large bowl, cream butter and sugars. Beat in eggs one at a time, along with the vanilla extract. Gradually beat in flour mixture at a low speed, stopping when just combined. Stir in chocolate chunks.
Drop by rounded tablespoons onto a parchment lined baking sheet and bake at 350F for 12-15 minutes, until the cookies are lightly browned at the edges.
Allow to cool on the baking sheet for about 5 minutes before transferring to a wire rack to cool completely.
Store in an airtight container.

Makes 3 dozen fairly large cookeis

Thursday, March 02, 2006

Cooking School: Pastry Cream and Mini Eclairs


Pasty cream, or creme patissiere, is one of the staples of a pastry chef. It is basically a thinner, sometime richer type of custard. It is most often used to fill things like donuts and eclairs, but it can be used as the base for a fruit tart or many other desserts. Another great use for it is in pain au raisin. The key thing about the cream is that it has to be smooth, so you must sieve it. Once your cream has cooked, simple pour it into a large, fine strainer and stir it out into a clean bowl. Make sure to press plastic wrap down on to of the cream to prevent it from forming a skin in the refrigerator. The pastry cream can be made a day or two in advance of when you want to use it and stored in the refrigerator.
This recipe for pastry cream is my own, not from a cookbook. It's a bit lighter than some versions because I use low fat milk and not whole milk, but feel free to use whichever you prefer. The most important part of making it is stirring after you have returned the combined egg/milk mixture to the stove to prevent the custard from burning. It takes several minutes to thicken completely, so you have to stir continuously. This constant stirring also helps prevent large clumps from forming.
I used my pastry cream to fill some miniature eclairs. Eclairs are made from choux pastry and are light, crisp and hollow on the inside. Choux pastry is not hard to make, though it does have the reputation of being something difficult. I have made it before, but I'll reprint the basic recipe here so you will have something to put your pastry cream inside.
The eclairs are light and delicious. Pipe the pastry cream into them only when ready to eat because they will soften somewhat if sitting around filled with cream. The best part about eating the finished eclairs is how the pastry cream oozes out the sides and back. You can't really go wrong with anything that oozes vanilla pastry cream.


Nic's Vanilla Pastry Cream
2 1/2 cups low fat milk
1/2 vanilla bean
2 eggs, at room temperature
2 egg yolks, at room temperature
2/3 cup sugar
1/3 cup cornstarch

In a medium saucepan, combine milk and vanilla bean. Bring to a simmer over medium heat then turn off heat. Scrape vanilla bean into milk.
While milk is cooking, combine eggs, egg yolks and sugar in a large mixing bowl. Beat until smooth, then add conrstarch and beat until smooth again. When the milk is done, pour a few tablespoons of milk into the egg mixture while whisking constantly. Repeat this a few times until about half of the hilk has been added. It is important to add the hot milk slowly (tempering) so you do not cook the eggs.
Add the remaining milk and return the whole mixture to the sauce pan. Cook, stirring constantly, over medium heat until the custard thickens - about 5 minutes.
Strain through a sieve into a medium bowl, cover surface of the pastry cream with plastic wrap and store in fridge until ready to use.


Eclair Choux Pastry
1/4 cup milk
1/4 cup water
3 1/2 tbsp butter (1.75 ounces), melted
1 1/2 tsp sugar
1/2 tsp salt
3/4 cup flour
2 eggs, at room temperature
chocolate (for topping)

Preheat oven to 400F.
Combine milk, water, butter, sugar and salt in a small saucepan and bring to a boil over medium heat.
Add the flour all at once, stirring vigorously with a wooden spoon until dough comes together in a ball. Continue to cook and stir for one additional minute.
Transfer dough to mixer or clean bowl and let mix at a low speed for 2 minutes until slightly cooled. Touch the outside of your mixer bowl and if it feels very hot, beat the mixture for another minute. Add eggs one at a time, waiting until the first egg is fully incorporated to add the next one. Increase mixer speed to make batter very smooth.
Transfer mixture into a ziploc bag or a piping bag. Snip the corner of the ziploc to create a 1/4-1/2 inch hole. Pipe mixture onto a parchment lined baking sheet, making 24-26 eclairs, 1 -1 1/2 inches long each (if you want to make large eclairs, simply increase the baking time until golden).
Bake for 20-25 minutes, until deep golden brown.
Cool completely on a wire rack.

To assemble Eclairs:
Melt chocolate into a small bowl and drizzle onto cooled eclair shells. Let chocolate set. Use a serated knife to cut eclairs in half, going almost all the way through the pastry to make a pocket. Transfer chilled pastry cream to a ziploc or piping bag and pipe inside the shells. Serve.

Makes 26 mini eclairs.