Monday, July 31, 2006

BlogHer 2006


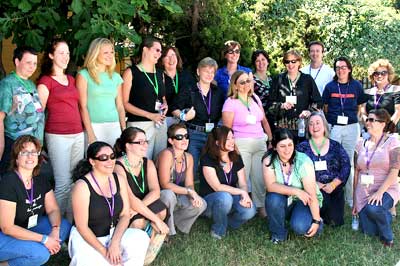
(Photo of food blogging group by Elise Bauer)


I'm back from BlogHer and I have to say that it was a wonderful event. I was able to meet a number of food bloggers, as well as a few people who were interested in getting started with food blogging. It is fascinating to hear people talk about why they blog and why they love it, and I'm glad that I was able to be a part of it this year.
The first day, we listened to some more technical talks about things like building traffic and photo blogging. I was inspired to try making a video or two, so if things work out, I might put up a short cooking clip on here sometime in the future. The second day, we all talked about the content of our blogs, why we blog and where our blogs are taking us. For me, one of the best things about blogging is being part of a community of wonderful people (commenters included!) and I was lucky enough to meet with a number of them on day two of the conference. Among the bloggers that I met were, Shuna from Eggbeater (who had some great t-shirts for sale), Pim from Chez Pim, Erin from Erin's Kitchen, Fatemeh of Gastronomie, Meg Hourihan of Megnut and Cheryl of Cupcake Bakeshop.
Saving the best for last, I also spent a lot of time with Elise from Simply Recipes and Kalyn of Kalyn's Kitchen. I can't say enough good things about the two of them, as they are wonderful women. The three of us, along with our conference friends Teri and Allison, all went out to dinner on Saturday night - taking a break from the rather appalling conference food - to an amazing Japanese restaurant in San Jose's Japan Town. We all kept on taking so long, that the restaurant workers were halfway through their meal at the end of the night before we noticed, offered our thanks, and left!
Overall, it was a great experience. I heard, while I was there, that the next BlogHer will be next summer in Chicago. I highly recommend that you come and join us, if you can make it, regardless of whether you are a blogger or simply enjoy reading blogs. We're keeping our fingers crossed for a whole food panel, which would make the conference even better.

Take a look at Elise's post to see some pictures of all your favorite food bloggers, or look at the whole Flickr group from the conference to take a peek at some of the speakers and other activities. Kalyn has a list of all the food bloggers who were able to meet up with us on Saturday, too.

Saturday, July 29, 2006

Sugar High Friday: Rice Pudding Ice Cream


I know that I've been doing a lot of ice cream posts lately, but with the temperatures getting to over 100F on a regular basis here over the last month, it's hard not to want a lot of cold food. Besides, I tend to make small batches of ice creams - not to mention that Sarah's chosen theme for this month's Sugar High Friday was cold desserts!
So, I'm not going to apologize for not doing a lot of baking lately, but I do promise to back of the ice creams for... at least a day or two. In the meantime, I encourage everyone to buy and ice cream maker.
Anyway, I wanted to do something a little bit different. I had heard the idea of rice pudding ice cream mentioned by a few people in passing and, the more I thought about it, the more appealing it sounded. I tried it and I loved it. It's just as easy as making rice pudding, chilling it and dumping it into an ice cream maker. This means that you could actually buy some rice pudding and do the same thing, if you don't want to make it yourself.
I made my favorite rice pudding recipe, which I like because you don't need pre-cooked rice for it to work. I used milk, instead of cream, because I felt that the starchiness of the arborio/short grained rice that I used would serve to add a thicker, richer texture to the final product. Skim milk or low fat is completely fine for this recipe, and soy milk will work well, too. If you want to make the ice cream richer - by which I mean more fattening - and lighter in texture at the same time, fold 1/2 cup of unsweetened whipped cream into the pudding before putting it into the ice cream maker.
The ice cream is very creamy, with some texture and a bit of chew from the rice. Think of it as having sprinkles (uh, very tender sprinkles) mixed into the ice cream - and that texture really sets it apart from plain ice cream and makes for a nice change. I used a lot of vanilla in my pudding, but you can add cinnamon or other flavored extracts, too.
This recipe also makes fantastic pudding pops.


Rice Pudding Ice Cream
1/2 cup short grain rice, uncooked (I used arborio)
3/4 cup sugar
2 1/2 cups water
1 vanilla bean, split
1 1/2 cups milk (any kind)


Combine rice, sugar, water and vanilla bean in a medium sauce pan. Bring mixture to a boil, stirring to dissolve the sugar, then reduce to a simmer until all the liquid has been absorbed, about 45 minutes. Carefully remove vanilla bean. Scrape out the seeds and stir them into the rice.
Stir in the milk and, keeping rice over low heat, bring to a simmer. Remove pudding when it begins to bubble, after 20-30 minutes. Transfer pudding to a large bowl and refrigerate at least 4 hours, or overnight.
Pour into ice cream maker and freeze according to the manufacturer's standard directions for regular ice cream. Scrape into a freezer-safe container and freeze for at least 30 minutes until serving.

Serves about 6.

Note: If you want to stir in some raisins at the end of the churning, feel free. I'm not a huge fan of raisins in ice cream, personally, but they do taste great in rice pudding.

Thursday, July 27, 2006

Cooking School: Chocolate Gelato


Gelato is Italian ice cream. While in composition it is not that different from other frozen treats, there are a couple of things that set it apart from a standard ice cream. First, it is generally made with milk and not with cream (some recipes do call for a small amount of cream). I've had many shopkeepers try to impress this upon me as a selling point, since it makes the gelato lower in fat than ice cream is (for the record, it works as a selling point). Second, gelato tends to be more dense than ice cream, with less air churned into it and fewer tiny ice crystals suspended in the mixture. This gives it a rich taste.
The final thing that sets it apart is that gelatos usually tend to have much stronger flavors than other ice creams. I won't go so far as to say that this is a standard feature of gelato, but in my experience, it tends to be true.
It is certainly true of this chocolate gelato. The recipe is from Bittersweet by Alice Medrich. While many chocolate gelato recipes call for melted chocolate, this one only uses cocoa powder to chocolatiness. The gelato is very smooth and very, very chocolaty. You can probably only eat a small amount at a time. I added to the chocolate - not that the incredibly rich flavor needed it - with some chopped chocolate. I opted to go for the varying sizes of chocolate chunks (and shavings) instead of chocolate chips because I thought they would blend better into the gelato. I used a chocolate chipper, which looks like a tiny pitchfork, to get the job done, but your can use a sharp knife to shave off pieces of chocolate.


Chocolate Chocolate Chunk Gelato
(adapted from Bittersweet)
3 cups milk
2/3 cup sugar
3/4 cup cocoa powder
1-1/2 tbsp cornstarch
about 3-oz chocolate, shaved/chunked (1/2 cup)


In medium saucepan, bring 2 cups of the milk just to a simmer, which is when you start to see steam rising from the pan.
In a medium bowl, whisk the remaining cup of (cold/room temperature) milk with the sugar, cocoa, and cornstarch. Once the milk in the saucepan has come to a simmer, add in the cocoa mixture. Cook, stirring constantly, until the mixture comes to a boil and begins to thicken. Cook for one more minute, then remove from heat.
Strain mixture into a large bowl, cover the surface with plastic wrap, and chill until cold. Overnight chilling is best.
Pour into your ice cream maker and churn according to manufacturers directions. Freeze until firm, at least 30 minutes, before serving. Stir in the chocolate chunks/shavings after churning or stir them in halfway through the churning process.
Makes about 1 quart.

Note: You can use any type of milk for this recipe, from skim to whole. I recommed going with low fat (1 or 2%), since it produces a creamy product and one that is lower in fat than one made with whole milk.

Tuesday, July 25, 2006

A new toy and a bit of news


I have a lot of knives. From no-name knives I've had forever to Henkels and Global knives, mine run the gamut from inexpensive to premium. But I think it's safe to say that I like my newest knife, a 6 1/2 inch Shun Santoku, the best. I love everything about it, from the look, to the feel, to the impossibly sharp blade.
Knives are a vital part of the kitchen and, unfortunately, too many people "make do" with sub-par knives. If you think about how much you need knives in cooking, it only makes sense to get one that performs well and will last a long time. Of course, you should always choose a knife based on its size, and how comfortable it feels in your hand, not just based on someone's recommendation (though I highly recommend a knife like this one or another high quality knife). By the way, Williams-Sonoma is a great place to check out knives because, unlike some retailers, they will let you test out all the knives in-store. They wil actually bring out a cutting board with a few things (potatoes, onions, etc), for you to chop up to get a feel for the knife.

In other news, posting will be a little bit slow over the next several days because I'm going to be going to the BlogHer conference this weekend. Anyone else going?

Sunday, July 23, 2006

Sunday Brunch: Yeasted Blueberry Pancakes

For some reason, yeasted pancakes don't seem to be quite as popular as yeasted waffles. This might have to do with the fact that pancakes are not supposed to be quite as "light" as waffles and that you can usually lighten the batter by beating the egg whites separately, if you simply want to get a puffier pancake.
I wanted a yeasted pancake recipe just to add to my collection, so I turned to this recipe from Bob's Red Mill, which is known for its various whole grain products, mostly sold at natural food stores. I added fresh blueberries and topped them off with some more of the blueberry syrup that I made earlier this week, leftover from dumpling making.
The pancakes themselves were delicious, light and fluffy. The baking soda stirred in at the end really raised them up. I would consider cutting the butter back to 1 tbsp in the future, but given that this recipe makes 6 generous servings (with blueberries), the overall fat content isn't really too high to be concerned by.
I will make a note about adding blueberries to pancakes. Once the pancakes have cooked on one side, put the berries in by hand and lightly dot each of them with batter. This will not only secure the berries in the pancakes, but the less time they spend on the griddle, the smaller the odds of them popping and discoloring the pancakes are. Some moisture will come out of the berries no matter what you do, so the pancakes will take longer to cook than berry-less ones .


Yeasted Blueberry Pancakes
(adapted from this recipe)
2 cups all purpose flour
1 tbsp active dry yeast
2 tbsp sugar
1 1/4 cups milk (low fat/skim is fine), warm
1/4 cup water, warm
2 large eggs
2 tbsp butter, melted
1/2 tsp vanilla extract
3/4 tsp salt
1/2 tsp baking soda
Blueberries

In a large mixing bowl, combine 1 cup of the flour, yeast and sugar. Stir in warm (110F) milk and water, mixing vigorously until smooth. Cover with plastic wrap and let stand for 1 hour.
In a small bowl, beat together the eggs, melted butter, vanilla. Stir in the rest of the flour and the salt. Pour into yeast mixture and stir until smooth. Add in baking soda and stir well. Batter will be quite thick.
Heat a griddle or large skillet until very hot; a drop of water will sizzle and dance on the surface.
Drop dollops onto hot griddle and cook until golden brown, adding berries (as noted above) halfway through cooking and covering each berry with a very small amount of batter before turning.
Serve immediately.

Makes 6 generous servings.

Saturday, July 22, 2006

Two-Tone Banana Milkshake


Unless you live in California, you might not know that we are having something of a heat wave. Sure, it gets hot here in the summer and I do technically live in the desert, but when the temperature is consistently over 106F, it takes a toll on your desire to do things. Like cook and eat.
Fortunately for me, I still feel like cooking. The thought of eating hot foods is another matter entirely. For an energy boost that took neither heat nor effort, I made a simple milkshake.
The classic American definition of a milkshake is a blended mixture of ice cream, milk and some sort of flavoring or fruit. This is known as a "thick shake" in countries like Australia and in the UK. There, milkshakes are traditionally cold, frothy flavored milks. I tend to view a milkshake as the latter, but this particular shake sort of spans the two types.
I blended partially frozen bananas with a bit of vanilla soy milk, then added chocolate to half of the batch. The shake isn't too sweet, especially the chocolate side, as I didn't add any extra sugar to it, but you can easily add in a few teaspoonfuls of sugar or a tablespoon of honey to sweeten it up and change the flavoring a bit. By pouring them into the glass simultaneously, I ended up with a neat swirled effect.


Two-Tone Banana Milkshake
2 medium/large bananas, frozen and partially defrosted
1/2 cup vanilla soy milk (or plain milk), divided
2-3 tsp cocoa powder
1 tbsp sugar (optional)

In a food processor, blend one banana with 1/4 cup milk (The banana should not be frozen solid). Pour into a measuring cup, one with a pouring spout, and set aside.
Blend second banana with remaining milk and cocoa powder. Add sugar, to taste, if desired.
Pour chocolate mixture and plain mixture simultaneously into a large glass.
Add a straw and enjoy!

Thursday, July 20, 2006

Cooking School: Beignets


As a general rule, I don't deep fry things very often. In fact, I rarely eat anything that is deep fried. I do enjoy frying because I think it's fascinating to be able to watch the food cook and dough, in particular, puff up and take on a lovely golden color. So, I am willing to make fried foods when I have a special request.
My brother requested doughnuts, and I made beignets. Close enough.
Earlier this year, I made cake doughnuts, which use no yeast. I prefer them to yeasted doughnuts because they seem more substantial, but beignets have something special about them.
Beignets are a traditional pastry in New Orleans that are made with a yeasted dough. The dough is rolled out into squares and deep fried. The unique thing about them is that they have pockets in the center, making them incredibly light. Unfortunately, the one I cut in half for the photo had only a small, off-center pocket, but the rest really did have them! More often than not, they are sweet, but savory versions of beignets do exist and are very popular in some places.
I like this recipe, which I got from eGullet because it allows for an overnight rise in the fridge. This means that aside from heating up the oil, there is minimal work to be done in the morning. Since beignets are part of a tasty - if not exactly balanced - breakfast, this is a particularly good feature of the recipe. The beignets are usually served with a dusting of powdered sugar, though anything from jam to syrup can be eaten with them. A cup of coffee or hot chocolate is, in my opinion, a vital part of the dish.
Mine were very light and fluffy in the center and slightly sweet. The outside is pleasingly crisp fry the frying and, thanks to some thorough draining, they didn't seem greasy at all. I will say that they were a bit thicker than some of the commercially made beignets that I have had, but with this sort of pastry, practice will produce a more perfect product.


Beignets
(recipe from eGullet)
3/4 cup warm water (110 to 115 degrees)
1 tsp active dry yeast
1/4 cup sugar
3 3/4 — 4 1/4 cups all-purpose flour
1/2 tsp salt
1/2 cup evaporated milk*
1 large egg
2 tbsp butter, very soft
canola (or safflower) oil for frying
confectioners sugar, to serve


In a large bowl (the bowl of an electric mixer), dissolve the yeast in the warm water. Mix in sugar, salt, egg, and evaporated milk. Add 2 cups of the flour and beat (by hand or with the paddle attachment) until smooth. Stir in the butter and 1 3/4 cups flour, switching to the dough hook towards the end of mixing if you are using an electric mixer. Add in remaining flour one tablespoon at a time until the dough comes away from the sides of the bowl into a soft ball. Cover the bowl with plastic wrap and let the dough rest in the refrigerator overnight.
In the morning, heat one quart of oil in a medium sauce pan (or more oil in a bigger pan if you want to cook a lot at a time), measuring it with a thermometer until it reaches 370F.
Scrap dough, which will have doubled in size, out of the bowl and onto a very lightly floured surface. Deflate and shape into a rectangle. Roll out the rectangle until it is 1/8-1/4 inch thick. Cut the dough into 25 squares using a pizza cutter.
Lower squares into hot oil and cook, turning once, until golden brown. Monitor the temperature to make sure it does not drop too low or get too high. Do not overcrowd the pan.
Drain on paper towels and dust generously with confectioners sugar before serving.
Makes 25 beignets
*Note: If you do not have evaporated milk, do not use sweetened condensed milk. In a pinch, you can substitute cream or light cream (which I had done) for evaporated milk and still get good results.

Wednesday, July 19, 2006

White Peach Crumble


When I buy fresh fruit, I almost always just eat it out of hand. I absolute love fruit desserts, but sometimes I just can't help but think that I'm missing out when I'm not eating them plain. After all, fresh, ripe fruit has a texture and flavor that is unmatched by cooked fruit. This is why I sometimes like to buy fruit in bulk. There is a time pressure to use it up quickly and more than enough for me to eat both raw and cooked.
Today, it was white peaches. In general, I am not a huge fan of peach flavor. I like it well enough, but I generally opt for nectarines instead of the furrier stone fruits. When I do get peaches, I prefer the slightly sweeter and less acidic taste of white peaches (and white nectarines) to the yellow ones, but the yellow ones have a stronger flavor when they've been baked.
This crumble is a simple dish of peaches with a crisp topping sprinkled over them. The flavor in the crisp is subtle and enhances the peach flavor wonderfully. It's a light, gorgeous summer dessert and one that will have you reaching for seconds, so even though the recipe really does serve 6, you might want to make it when you only have to serve three or four and prepare a light dinner to go with it.
It also makes a tasty breakfast - without ice cream, of course.
I'll warn you that some juice will come out of the peaches as they bake, so there could be some liquid at the bottom of your pan when you're serving. It's nothing to worry about and tastes delicious - it just is an indicator of how wonderfully ripe your peaches were.


Peach Crumble
5 large, ripe peaches (white or yellow)
1/2 cup flour
1/2 cup oats
6 tbsp sugar
1/4 tsp salt
1/2 tsp cinnamon
1/2 tsp ginger
3 1/2 tbsp (50g) butter, cold
Preheat the oven to 375F.
Bring a small saucepan of water to a simmer on the stovetop. Set a bow of cool water next to it. Cut a shallow X in the bottom of each peach and submerge in simmering water for about 30 seconds. Dunk in cold water, then peel off skin. Repeat with all peaches. Slice peeled peaches into about 10-12 pieces each.
In a large bowl, combine all dry ingredients. Cut butter into 6 or 8 pieces and rub in to flour mixture to create coarse crumbs.
Place peach slices in a pie dish and distribute crumble topping over the top.
Bake at 375F for about 30 minutes, until the crumble browns at the edges and the peaches are tender. Let cool for at least 20-30 minutes before serving.
Serve with vanilla ice cream or plain.
Serves 6.

Tuesday, July 18, 2006

Blueberry Dumplings


Since I mentioned that I bought a huge box of blueberries yesterday, I thought I'd let you know what I did with it. First of all, I ate a lot of the berries out of hand, munching on them throughout the weekend. They went surprisingly quickly. Second of all, I made dessert.
Tempted though I was to make muffins, I wanted to do something that would be fairly light, easy and use up a lot of berries. I considered pie, but ultimate decided that I wanted something lighter. Even though they are often considered to be a winter-time comfort food I chose to make dumplings in berry sauce. After all, you just can't get fresh berries of this quality in winter.
Now I will say right now that I am not an expert in dumpling-making, so if your grandmother's recipe is better than this one, by all means go ahead and use that one. My grandmother didn't make dumplings, so I was on my own. I think they're really easy and can be either rich and buttery, almost like a scone, or soft and fluffy. These are the fluffy variety and get a butter taste from the buttermilk without actually using any butter in the recipe.
I adore the sauce, and it's worth making even if you're not going to do the dumplings. Serve it (and the dumplings) hot, over ice cream or frozen yogurt.


Buttermilk Dumplings in Blueberry Sauce
For the Sauce:
3 cups blueberries
1/4 cup water
3-4 tbsp sugar (to taste)
1 1/2 tsp cornstarch mixed with 1 tbsp water

For the dumplings:
1 cup all purpose flour
1 tbsp sugar
1/2 tsp salt
2 tsp baking powder
1/4 tsp fresh nutmeg
3/4 cup buttermilk (approx)
1 tsp vanilla


For the sauce: In a medium saucepan, combine the berries, water and sugar. Bring to a boil and cook for about 10-15 minutes, until most of the berries have popped. Stir in the cornstarch/water mixture and cook for an addition minute, unti lthe syrup thickens slightly.
Turn heat to a low simmer and cover.

Meanwhile, make the dumplings. Combine flour, sugar, salt, baking powder and nutmeg in a medium bowl. Add in the vanilla and gradually add in the buttermilk, stirring until the dough comes together. The final dough should be wetter than a scone dough, but thicker than waffle or pancake batter, so if it is too dry, add an extra tablespoon or two of buttermilk.

Drop golf-ball sized dollops of dough (3-4 at a time, depending on your sauce pan) into the blueberry sauce. Cover the saucepan and cook for 7-10 minutes (depending on ths size of your dough balls), until the dumplings spring back slightly when you poke them with a spoon.
Scoop out, along with some sauce, and serve immediately - alone or with ice cream.
I recommend serving them in a bowl, not on a plate.

Serves 4.

Sunday, July 16, 2006

Sunday Brunch: Light and Crispy Waffles

I woke up with a craving for Belgian waffles. It probably had to do with the fact that they were giving away free samples yesterday when I was shopping at Costco. Granted, their waffles were served with "pancake syrup" (which is really just flavored corn syrup) instead of maple, but they were very tasty. Crispy, crunchy and light.
My first thought was to use a recipe for Belgian Waffles that I've made before, but I didn't have any cake flour and I make it a general rule not to run to the market before 6am - mostly because I prefer to lounge in my pjs for a while. I remembered the very catchily-named Waffles of Insane Greatness from the last round of DMBLGiT and looked up the recipe; I already knew that they would be good.
I changed the ingredients around a bit, though. I made the batter thicker and added a bit more leavening. They turned out to be fantastic: crispy, crunchy and light. The waffles were barely sweet, but this made them the perfect foil for maple syrup (not pancake syrup) and I imagine that they'd be wonderful with powdered sugar, too. The berries I added on top were from a 2.25-lb box from Costco and are now mostly gone - just like the rest of the waffles.
In my Belgian waffle iron, this only made three full waffles. It will probably make 4 in a regular iron, but double it if you want more than that.


Light and Crispy Waffles
(adapted from the Waffles of Insane Greatness)
2/3 cup all purpose flour
1/3 cup cornstarch
1 tbsp sugar
1/2 tsp baking powder
3/4 tsp baking soda
1/4 tsp salt
1 cup milk (I used lowfat)
1/3 cup vegetable oil
1 large egg
1 tsp vanilla extract


In a large bowl, whisk together flour, cornstarch, sugar, baking powder, baking soda and salt. Make a well in the center and pour in milk, oil, egg and vanilla. Whisk together until fully combined.
Let batter rest for 30-60 minutes at room temperature.
Preheat your waffle iron and cook according to the manufacturer's instructions (the oil in the waffles should eliminate the need to grease the iron).
Serve immediately with syrup, butter and/or berries.

Thursday, July 13, 2006

Cooking School: Jelly Roll


There are many, many bad recipes for jelly rolls out there. This is surprising because it is an incredibly simple thing to make.
A jelly roll, also known as a swiss roll, is a large, thin rectangle of sponge cake that is spread with jam and rolled up. It is traditionally served with only a dusting of powdered sugar, but some variations - noteably the Yule Log - call for frosting the cake and many people perfer to top each slice with a dollop of whipped cream. The cakes have been fairly popular since the mid 1800s, but have recently seen a decline in popularity due to an increased preference for sweeter, more decadent cakes.
I really like these relatively plain cakes, so it's a shame that more people aren't enjoying them. They are light, just sweet enough from the jam, and very attractive. They go wonderfully with tea.
The recipe I used is from Paula Deen. I have made chocolate and pumpkin rolls in the past, but Paula's Old South Jelly Roll is actually the most reliable that I have come across and it certainly produced excellent results. The cake is light and even, with a nice crumb and a slight sweetness. I love the fact that Paula didn't skimp on the vanilla, so the cake had a nice flavor and wasn't eggy, which sometimes sponge cakes are. It was also very easy to handle, as the rolling is the most difficult part of preparing this cake.
Once it is baked, the cake should be turned out onto a sugared dish towel and rolled up. The hot cake will roll smoothly and without cracking and the moisture that is trapped by the towel will keep it tender as it cools. The jam can be spread into the cooled cake before easily re-rolling it. Use any kind of jam. I used a mixed berry here, but you can never go wrong with strawberry or raspberry.
It should be noted that the cake should be served the day it is made or, if you make it the day before, be sure to wrap it well. Since there is so little fat in the cake, it will dry out a bit if left out. Serve it with a generous dusting of powdered sugar if you're a traditionalist, like me, or whipped cream and berries, if you prefer.


Old-Fashioned Jelly Roll
(from Paula Deen)

4 large eggs, separated, at room temperature
3/4 cup plain sugar
1 tbsp vanilla extract
3/4 cup cake flour, sifted
3/4 tsp baking powder
1/4 tsp salt

powdered sugar
filling: about 1 cup jam


Preheat oven to 400F.
Line a 15 by 10 by 1-inch jelly roll pan with parchment paper.
In a large bowl, beat the egg yolks with an electric mixer until light. This will take a few mintues. Gradually add in the sugar, followed by the vanilla, and mix until fully combined. Sift the cake flour, baking powder and salt into the yolk mixture and beat in until just combined.
Quickly clean and dry beaters well, then beat the egg whites to soft peaks in a medium bowl.
Gently stir 1/2 of the egg whites into the flour mixture, then fold in the rest of the whites until the batter is even. Pour into prepared pan.
Bake at 400F for 8 to 10 minutes, until the cake is golden and springs back when lightly touched.

Dust a large dishtowel with powdered sugar.
When cake comes out of the oven, loosen edges of cake, then place the sugared towel on top of the cake (yes, some will come off), then invert the pan so the cake comes out onto the towel (which should be lying on a table or counter). Trim off the firm edges.
Beginning with the short side, roll cake and towel up together. Place towel wrapped cake on a wire rack and let cool.

When cake is cool, gently unroll and spread with jam (or jelly) and re-roll. Place on a serving plate.
Before serving, sprinkle with powdered sugar and/or top each slice with a dollop of whipped cream.

Serves 8.

Wednesday, July 12, 2006

Banana Buttermilk Ice Cream


I have a feeling that I am going to be making a lot of ice cream/sorbet/frozen yogurt this summer. For the past five weeks or so, it has regularly been over 100F in my neighborhood. Granted - that's not completely unusual for the summers out here, but it's still pretty hot. I don't mind the heat, though, and I certainly don't mind more opportunities to have some frozen treats.
For some reason, there are some people who are put off by the idea of "sorbet" but not by ice cream. It is for this reason that I have decided to call this creamy frozen dessert "ice cream" even though it is very similar to the Buttermilk Sorbet I made a little while ago. Basically, I added more buttermilk and a whole bunch of pureed bananas. Easy, right?
It turned out great. The bananas definitely made it more ice cream-like than the sorbet in terms of texture and I'm glad that I didn't add any extra sugar because not only were the bananas sweet, but the buttermilk flavor wasn't convered up. The resulting ice cream was very creamy, with an addictive, refreshing tang from the buttermilk and a good banana flavor.
Since this is a frozen treat, the bananas should not cause the ice cream to discolor at all, so don't worry about having to add anything to prevent that.


Banana Buttermilk Ice Cream
3 medium/2 large, ripe bananas (enough to make 1 cup puree)
1/2 cup sugar
2 1/2 cups buttermilk
2 tsp vanilla extract


In a food processor, combine bananas and sugar and process until very smooth. As the motor runs, add in buttermilk and vanilla.
Pour mixture (which will taste great even at this point) into your ice cream maker and freeze as directed. Mine took about 15 minutes.
Transfer to a freezer-friendly container with a lid and freeze until firm (at least 30 minutes) before serving.

Serves 6.

Monday, July 10, 2006

Making a Magic Loaf


I really like Jennifer's site Vegan Lunch Box, which hopefully you have all seen before via the link in my sidebar. Jennifer blogs what she packs for her son's lunch everyday, dealing with the changing and occasionally idiosyncratic tastes of kids as well as the fact that they're vegan and the other kids at school aren't. To make sure her little "schmoo" isn't left out, she sometimes gets quite creative with her lunch options, like vegan corndogs, homemade twinkies and vegan meatloaf.
Now, vegan meatloaf may sound like a bit of an odd concept, but I assure you that it can be a good one. And I know a think or two about meatloaf: my regular meatloaf won a contest.
I used an application that Jennifer created called the Magical Loaf Studio, which combines the ingredients of your choice into a meatloaf recipe, or rather, an un-meatloaf recipe. I've never tried an automatically generated loaf recipe and this seemed like as good a time as any to start.
I considered using black beans as my protein, but I ended up using a package of Yves Veggie Ground Round, which is a very tasty veg product that I've seen at Trader Joe's and even my regular supermarket. I added a little bit more breadcrumbs than the auto-recipe called for, but overall I would say that the experiment was a huge success. It tasted great and was easy to do. I would describe it as juicy, meaty and very meatloafy. And my loaf made great sandwiches the next day, so I think that the loaf studio has the potential to generate some real winners.


Vegan Meatloaf
(via the Magical Loaf Studio)
1 medium onion, diced
1 large garlic clove, minced
1/2 cup carrot, peeled and grated
1/2 cup celery, diced
1 package Yves Veggie Ground Round
1 1/4 cup dry whole wheat bread crumbs (lightly toasted or slightly stale)
1/4 cup oatmeal, cooked with 1/2 cup water
1 tsp ground cumin
1/2 tsp paprika
2 tbsp ketchup
2-3 tsp vegetarian Worcestershire sauce
Black pepper, to taste
1 tsp salt

Preheat the oven to 350F. Cover a baking sheet with aluminum foil.
Saute onion, garlic, carrots and celery in a large pan until tender, about 10 minutes on medium-high heat.
Combine vegetables, veggie meat, breadcrumbs, oatmeal and all spices in a large bowl and mix together. If it doesn't stick together easily, add a extra tbsp or two of dry breadcrumbs.
Turn mixture onto foil-covered pan and pat into a rectangular loaf about 2-in. high.
Bake for 1 hour to 1 hour 15 minutes until loaf is slightly firm to the touch.
Let cool for 15 minutes before slicing.
Serves 3-4.

Saturday, July 08, 2006

Whole Wheat Maple Muffins


While I usually opt for sweet, fruit-laden muffins, sometimes it is nice to have something plainer and more versatile available. Case in point are these muffins. They are healthy - low in fat and full of good things like yogurt and whole wheat flour - and they taste good. They are fairly plain, with a subtle sweetness, and can act as a stand-in for a dinner roll with savory foods or accompany breakfast when slathered with jam. Peanut butter could be applied for an afternoon snack, too.
You'll notice that I said I used whole wheat flour. What I actually used is whole wheat pastry flour - and there is a significant difference between the two. Whole wheat pastry flour is lighter in texture than ordinary whole wheat, so it is softer and performs in much the same way as all-purpose flour does in baked goods, though it does lend a slightly wheatier taste to the finished product.
It took me some time to track down my bag of the flour, as they don't carry it in many regular grocery stores. I ended up finding it at a specialty, upscale market, though some Whole Foods locations stock it, too. If you cannot find it, use half whole wheat flour and half all-purpose to achieve a similar taste and texture.

In this batch, I added 1/2 cup of frozen cranberries. Any type of fruit may be added, but it does reduce the versatility of the muffin somewhat, committing it to sweeter servings. Feel free to omit the fruit entirely, if you wish.


Whole Wheat Maple Muffins
1/3 cup milk (lowfat or skim)
1 cup plain yogurt*
1 large egg
1/2 cup maple syrup
2 cups whole wheat pastry flour
1 1/2 tsp baking soda
1/2 tsp cinnamon
1/4 tsp nutmeg
1/2 cup berries (optional)


Preheat the oven to 375F and lightly grease a 12-cup muffin tin.
In a large bowl, whisk together milk, yogurt, egg and maple syrup.
In a medium bowl, stir together whole wheat pastry flour, baking soda, cinnamon and nutmeg. Pour into the large bowl and stir wet and dry ingredients together until just combined, mixing in berries at the last minute, if using.
Distribute batter evenly in 12 muffin cups.
Bake for 15-18 minutes at 375F, until the muffin springs back when lightly pressed and a tester comes out clean.
Remove from tin and cool completely on wire rack before serving.


*Note: I used nonfat Greek yogurt, a style a highly recommend, but any fat content should work.

Thursday, July 06, 2006

Cooking School: Shortbread


There is something so delicious about shortbread, beyond just the flavor. I think it's the simplicity that makes it so appealing, that a few basic, simple ingredients can come together into an amazing product.
And that description is not over-the-top if you have had good shortbread.
I am of the opinion that everyone should know how to make shortbread. It is incredibly easy and you only need flour, butter and a little sugar. It's hard to mess up. All you do is combine all the ingredients - I prefer to rub the butter in by hand, but it is perfectly acceptable to use a food processor - press into a pan and bake.
Of course, though plain shortbread is wonderful, there are many ways you can liven it up. For this batch, I added the zest of a lemon. Orange zest is an equally good choice. In the past, I have used mints and chocolate-covered espresso beans to top them, giving the shortbread a pleasing seasonal appeal, but just about any dried spice or herb can be added.
This recipe produces shortbread that is crisp and seems to melt into your mouth as it crumbles. I doubled the original recipe, increasing it from an 8x8 pan to a 13x9 pan. The baking time only needed to be extended by a minute or two, but I recommend watching the corners of the pan for browning. As they turn golden, the shortbread is done.


Shortbread
(from a Better Homes and Gardens Recipe)
2 1/2 cups all-purpose flour
6 tbsp sugar
1 cup unsalted butter, cold and cut into 10-12 pieces
1/4 tsp salt


Preheat oven to 325F.
In the bowl of a food processor, combine flour, sugar and salt. Pulse to combine. Add butter to flour mixture and pulse until mixture looks like very coarse sand.
Press evenly into 13x9-inch baking sheet.
Bake for 25-32 minutes, until the corners turn golden.
Let cool for 5 minutes, then gently score with a knife (a pizze cutter works wonderfully), cutting the shortbread into 30 pieces. Allow to cool completely in the pan.
Store in an airtight container.
Makes 30 pieces


Variations: Add zest of one lemon or one orange (or both) for a bright, summery variation. Add 1 tsp cinnamon, ginger or cardamom for spicer versions.
If you have vanilla sugar, this would be an excellent recipe to use it in.

Wednesday, July 05, 2006

Chocolate Whole Wheat Honey Biscuits


Here's one more Independence Day-inspired post, though only the icing is red, white and blue. The cookies themselves neither need icing nor have anything to do with the holiday. In fact, though they are entirely dissimilar from gingerbread cookies in terms of their ingredients, they have a taste and texture similar to gingerbread that would make them excellent in the winter, too.
The recipe is one that I based on a Maida Heatter recipe for Whole Wheat Honey Wafers, which she describes as "old fashioned and plain." While these do taste a bit old-fashioned, they are far from plain and quite different from the original recipe.
I used white whole wheat flour to make these (King Arthur brand), but you could use a combination of whole wheat and all purpose as a substitute. The wheat flavor was not really evident, but the thing that struck me about the cookies is that they had an interesting depth of flavor. Right out of the oven, they had a little bit of a mexican chocolate thing going on, with cocoa and cinnamon standing out. After sitting overnight, the cookies softened up and the similarities to gingerbread (a soft, spicy cookie) were more apparent.
Of course, these aren't gingerbread, so don't be put off by that comparison if you're not a fan. The important things to know about these cookies are (1) the dough is sticky and should be frozen before you work with it, (2) they a nice and soft once they sit overnight, but slightly crisp on the first day and (3) they are not too sweet and have just the right amount of spice to appeal to both spice-lovers and non-spice-lovers.
And they're just as good without the icing, which is simply a mix of powdered sugar, vanilla, milk and food coloring that I drizzled over for color.


Chocolate Whole Wheat Honey Biscuits
1 3/4 cups white whole wheat flour (or half all purpose and half whole wheat)
1/4 cup unsweetened cocoa powder
1/2 tsp baking soda
1/2 tsp salt
1/2 tsp cinnamon
1/2 cup butter, room temperature
2 tsp instant coffee (or 1 tsp coffee extract)
2/3 cup brown sugar
1/3 cup honey
1 large egg
1 tsp vanilla extract


In a medium bowl, whisk together flour, cocoa powder, baking soda, salt and cinnamon.
In a large bowl, cream together butter, coffee powder and brown sugar. When light, beat in honey, egg and vanilla until smooth. Gradually beat in the flour mixture and stop when just combined. Divide dough into two or three discs, wrap in plastic wrap or wax paper and freeze for at least 1 hour.
Preheat oven to 375F. Line a baking sheet with parchment paper.
Work with one dough disc at a time on a lightly floured surface. Roll out (flouring rolling pin or using wax paper to prevent sticking) the dough until it is 1/4 inch thick. Use a 2 1/2 inch star cookie cutter (or other shape) and punch out as many starts as possible. Transfer to prepared baking sheet. The cookies will puff up during baking, so make sure to leave at least 1-inch between them on the pan. Reroll dough one or two times and repeat.
Bake cookies at 375F for 8-12 minutes (depending on the exact size of your cookie cutter). The cookies are done when the edges just start to brown and are slightly firm, or the tips of the stars darken slightly.
Allow to cool on baking sheet for about 5 minutes, then cool completely on wire rack. Ice when cooled, if desired. Store in an airtight container.

Makes about 3 dozen cookies.

Tuesday, July 04, 2006

Red, White and Blue Bread


It may look strange, but I assure you that this bread is perfectly normal. In fact, it's simply a white, sandwich-type bread that I dyed red and blue in honor of the 4th of July.
It was actually really fun to make this bread. I mixed up three small batches of dough, all at the same time, and added food coloring to get the colors dark enough. I had to add quite a bit of food coloring to get the colors nice and dark. I didn't measure it, but I'll estimate that it was 1/2 tsp per color.
The bread had an excellent, fresh flavor, with a soft texture and crisp crust. It made wonderful toast, sandwiches and, if there were any left, I have no doubt that it would have made wonderful french toast, too.

Happy Independence Day.


My recipe is written a little differently than my usual style here:


Patriotic Sandwich Bread
In each of three bowls, combine:
1 tsp active dry yeast
1/2 cup water, room temperature
1 cup all purpose flour
1/2 tsp salt
1 tsp butter, melted and cooled
1 tsp sugar


In one bowl, add blue food coloring (enough to get a very bright color) and add red food coloring to another. Leave the third bowl "white."
Stir each bowl until the dough comes together and pulls away from the sides of the bowl. Add an extra tablespoon or two of flour, if necessary.
Working with each piece in turn, knead for about 5 minutes until smooth and elastic. Place each piece in a lightly oiled bowl, cover with plastic wrap and let rise for about 1 hour, or until doubled in size.
After they rise, turn the three doughs out onto a lightly floured surface and gently deflate. Press the doughs together (I twisted them up) and shape into a rectangle. Place in a lightly greased 9x5-inch loaf pan. Cover with a piece of lighly oiled plastic wrap and let rise until about 1/2 inch above the rim of the pan, about 45 minutes.
Meanwhile, preheat the oven to 375F.
Bake loaf for 35 minutes at 375F, until golden.
Turn out of loaf onto a wire cooling rack and cool completely before slicing.

Sunday, July 02, 2006

Sunday Brunch: Dutch Babies


I love Dutch babies. No, not as in children (though I'm sure they're all just lovely), but as in the large puffy, oven-baked pancakes.
Unlike regular pancakes, the batter has a much higher ratio of eggs to flour, which gives them the same sort of lift that you might find in a souffle. Unlike a souffle, you actually want these to fall when they come out of the oven - and they definiately will. Not to worry, though, because the indentation is perfect for filling with syrup or some gently cooked fruit. Though my favorite way to eat them is with a generous amount of maple syrup, I think that bananas are a good choice and I have also had good luck with both apples and berries on top of Dutch babies.
It is imperative that Dutch babies be served right out of the oven. This way, the texture will be perfect. The pancake will have a slightly crisp edge and a soft, almost custardy interior (which I attempted to capture in the photo below, when the pancake had deflated slightly) that gives them a perfect texture.
You will have to resist making another one immediately.
I made these in my 6-inch stainless steel skillet. Each one serves two people, or one very hungry person. Double the recipe and cook in a 10-inch skillet if cooking for 4-6 people.

A warning: my dutch babies are nowhere near as buttery as Molly's, but I'm not one for vast amounts of butter in the morning. If you are, try her recipe, instead.


Dutch Babies
2 large eggs
1/2 cup all-purpose flour
1/2 cup milk (nonfat, lowfat or otherwise)
1 tbsp granulated sugar
1 tsp vanilla extract
1/4 tsp salt
1/2 tbsp unsalted butter, melted and cooled slightly

Preheat oven to 425 degrees.
Place ovenproof frying pan (stainless steel or cast iron) in the oven to heat.
Whisk together eggs, flour, milk, sugar, vanilla, salt and melted butter until smooth.
Remove pan from oven and spray with nonstick cooking spray (or quickly brush with some butter), then pour the batter into the hot pan and put it back in the oven.
Bake for 15-20 minutes, until the Dutch baby is golden brown.
Slide from the pan onto a serving plate and serve immediately.
Serves 1-2.


Note: For a Dutch baby in a 10-inch skillet, double the recipe and cook for 20-25 minutes.